2- Multiple Sections
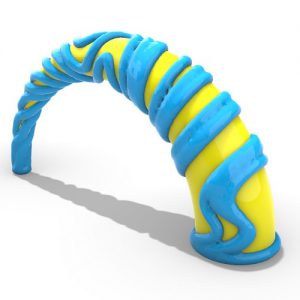
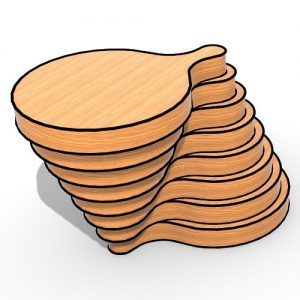
In this lesson, you will learn how to use multiple sections and a curved path to produce a parametric model. First I will explain how we can orient the section into the perpendicular planes and then we will model the rest.

In this lesson, you will learn how to use multiple sections and a curved path to produce a parametric model. First I will explain how we can orient the section into the perpendicular planes and then we will model the rest.
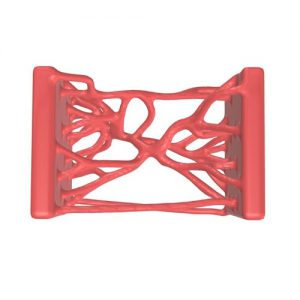
In this Grasshopper Dendro example file, you can use the Trap Field component from the Heteroptera plugin to generate a series of random connecting curves between two faces.
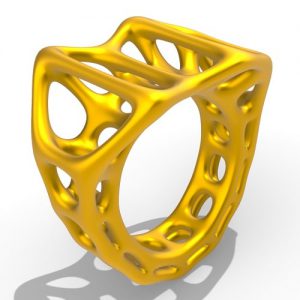
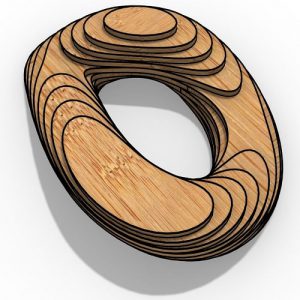
In this Grasshopper tutorial for beginners, you can learn how to model a parametric box ring from scratch without using any plugins.
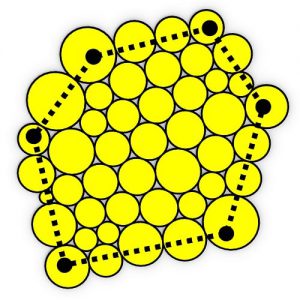
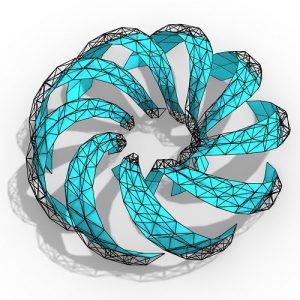
In this Grasshopper Kangaroo example file you can design a parametric earring using the circle packing technique.
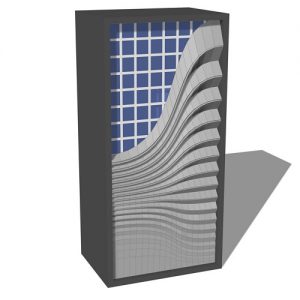
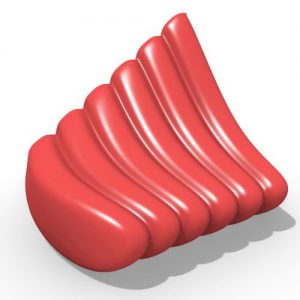
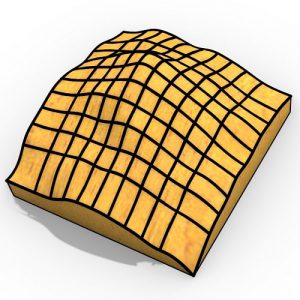
In this Grasshopper example file you can design a parametric Louver facade using the Pufferfish Plugin.
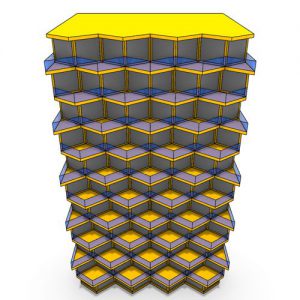
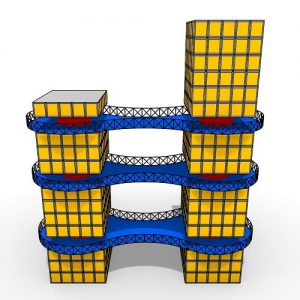
In this Grasshopper example file you can design a parametric building using the native grasshopper components.
In this Grasshopper Dendro tutorial, you can learn how to create a growing mesh by defining a series of spin fields on a NURBS surface using the Heteroptera plugin.
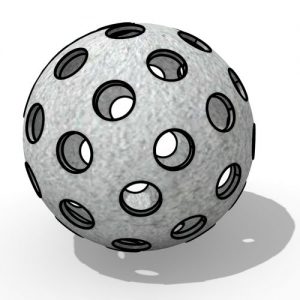
In this Grasshopper Tutorial for beginners you will learn how to use the Sphere collide component to generate evenly distributed holes on a NURBS surface.
In this Grasshopper Kangaroo example file, you can circle pack a mesh using the "TangentIncircles" component.
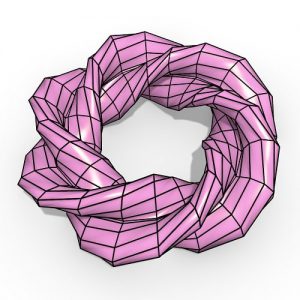
In this Grasshopper example file, you can utilize the Nautilus plugin to design a parametric Twisted Torus.
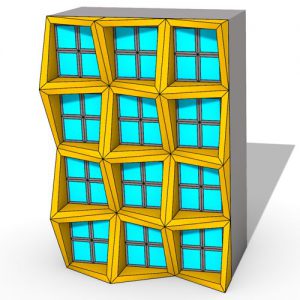
In this Grasshopper example file, you can model twisted torus strips and convert them into a spaceframe and panels using the Lunchbox Plugin.
In this Grasshopper example file, you can convert a series of curves into a mesh with a 3d groove pattern using the Nautilus and Weaverbird plugins.
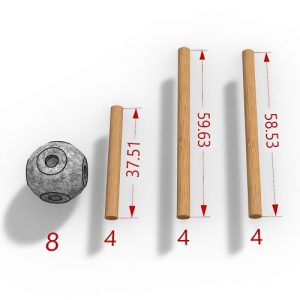
In this Grasshopper tutorial, you will learn how to model a parametric joint on the corners of a box with controllable parameters.
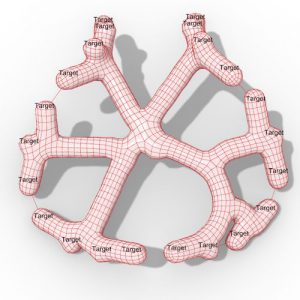
In this Grasshopper example file, you can simulate an optimized path from an origin point/points toward a set of targets. The strategy involves branching at diverging points.
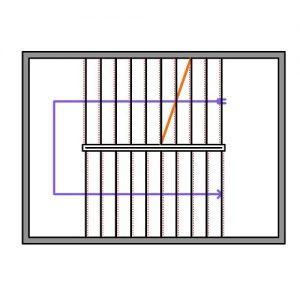
In this Grasshopper example file, you can model a staircase detail drawing from the plan view and easily change the parameters.
In this Grasshopper example file, you can design a parametric facade using four different techniques.
In this Grasshopper contour tutorial, we will learn how to extract a series of solids from a part of a mesh by defining the direction and length with a single line.
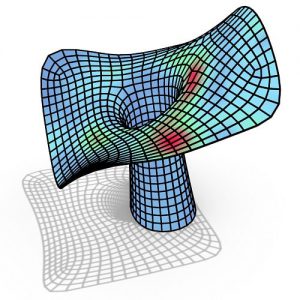
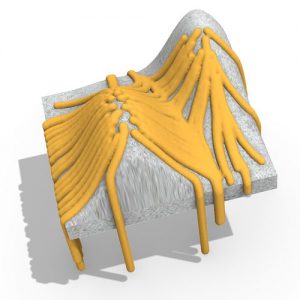
In this Grasshopper Millipede tutorial, you can learn how to model a series of smooth connecting columns to a roof and then analyze it using Millipede's Finite Element Analysis.
In this Grasshopper Kangaroo tutorial, you can discover how to simulate the flow of a series of particles on a solid and then convert it into a mesh.
In this Grasshopper tutorial, you can learn how to generate Perlin noise on a surface and convert it into a solid.
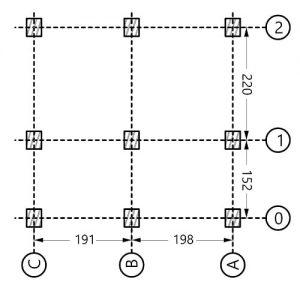
In this Grasshopper tutorial, we will learn how to generate a structural grid from a series of grid points.
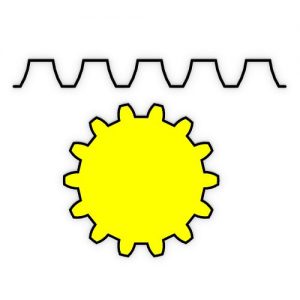
In this Grasshopper tutorial, we will explore how to create a simple parametric gear and a radial mechanism, and also include an example file for the Iris mechanism.
In this Grasshopper tutorial, we will learn how to create a series of parametric solids using the "Tangent Arcs" component.
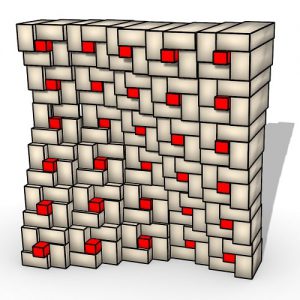
In this Grasshopper tutorial, we will model a parametric brick wall on a NURBS surface with a rectangular projection. We can also adjust the thickness of the bricks based on point attractors.


Comments
Nathaniel
Attachment rails-n-sections.png
I feel kind of silly for asking, but I’m stuck at one of the final steps. My surface is totally curvy on top, with no edges. How would I split the surface through the middle, leaving one side to be the “cushion”?
(My initial idea was to use the original curve, but the component Surface Split was not satisfied with this original curve…)
rezae
Hi Nathaniel I checked the attached photo
the way your are thinking is right but the Split Surface component, split when the curve is on the surface so at first you have to use BBX(brep brep intersection) component to generate intersecting curve and then use Split Surface component to split the surface