
Geodesic Frame
In this Grasshopper tutorial, you will learn how to use the Geodesic dome component from the Parakeet Plugin. You can combine the base mesh with the Weaverbird plugin Components to Produce the final results.

The “Geodesic Dome” component from Parakeet plugin, can simply generate a geodesic dome based on a icosahedron. “Base Point” input receives any given point which defines the center of the geometry. You can change the dome’s size by simply giving a number slider to the “Radius” input. And “Dome Frequency” would define the number of subdivisions on the geometry.
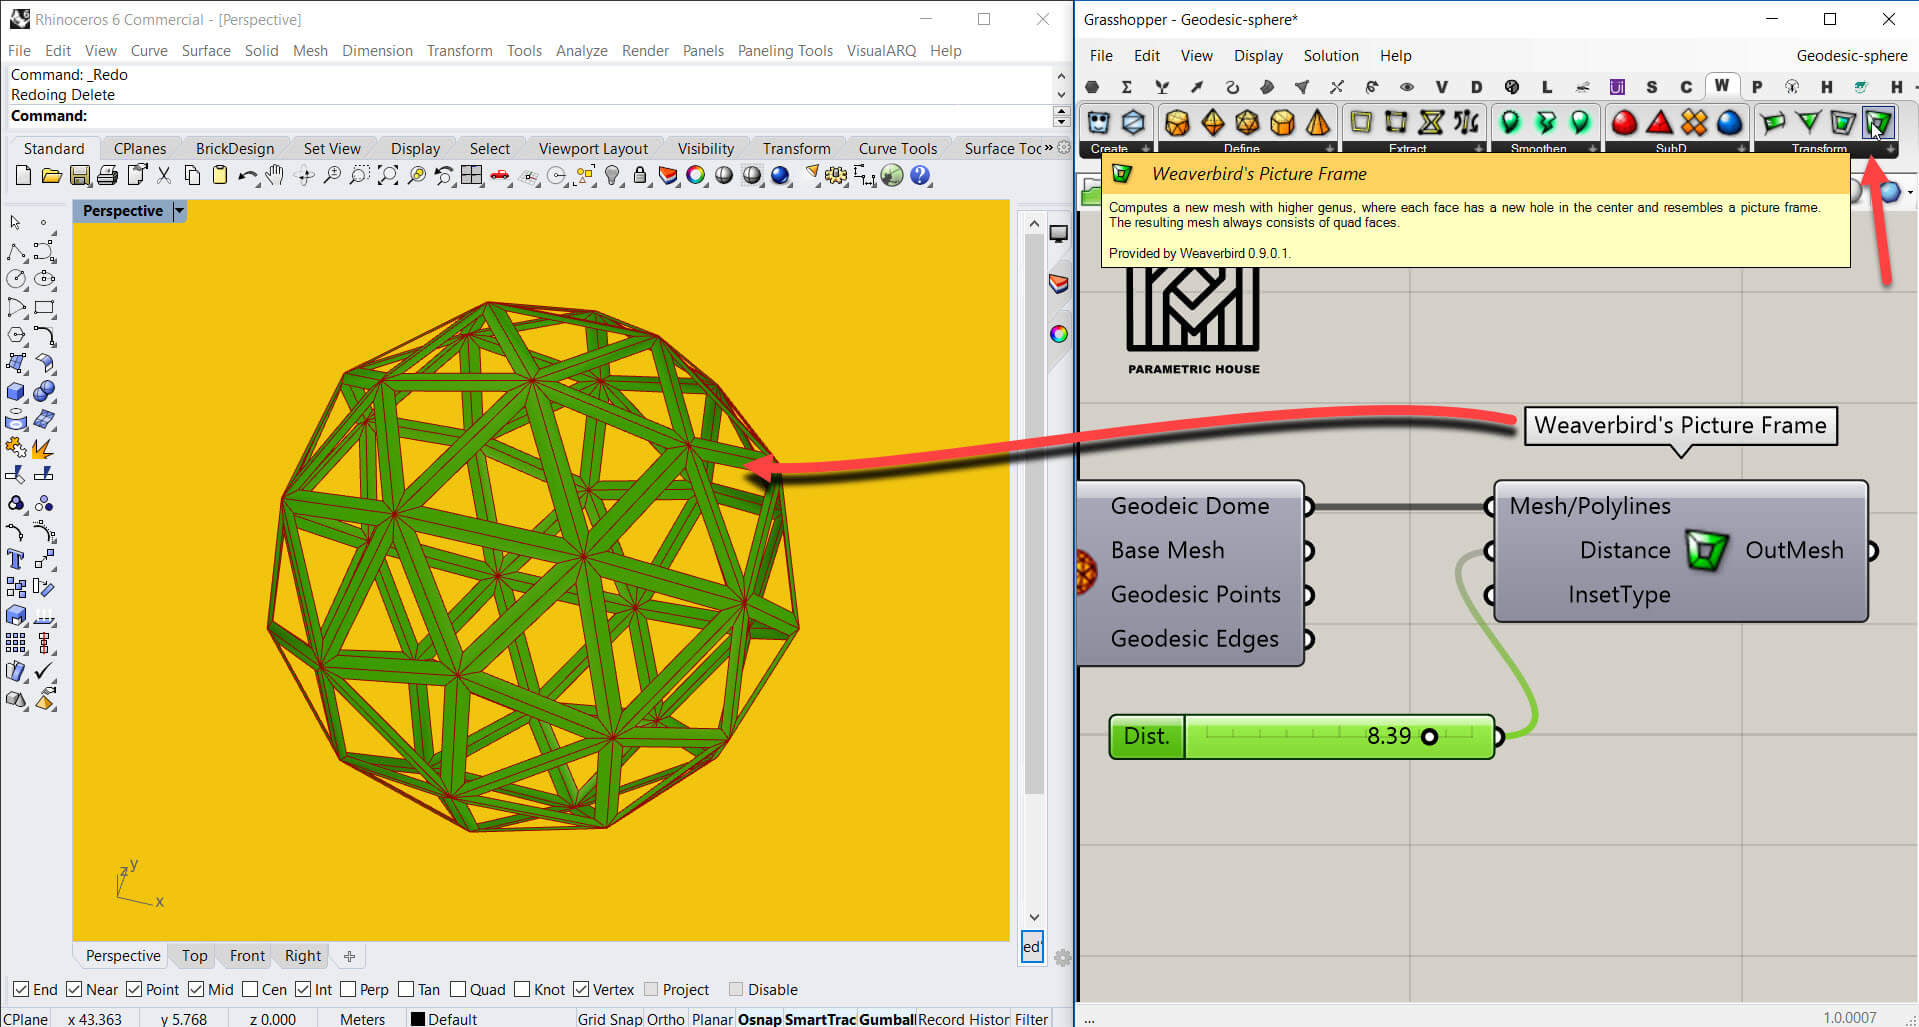
“Weaverbird’s Picture Frame” component can define a picture frame pattern on any given mesh or make one out of a polyline. By changing the number slider you give to the “Distance” input, you can change the width of the frame. Remember that the distance you define here is a scalar value.
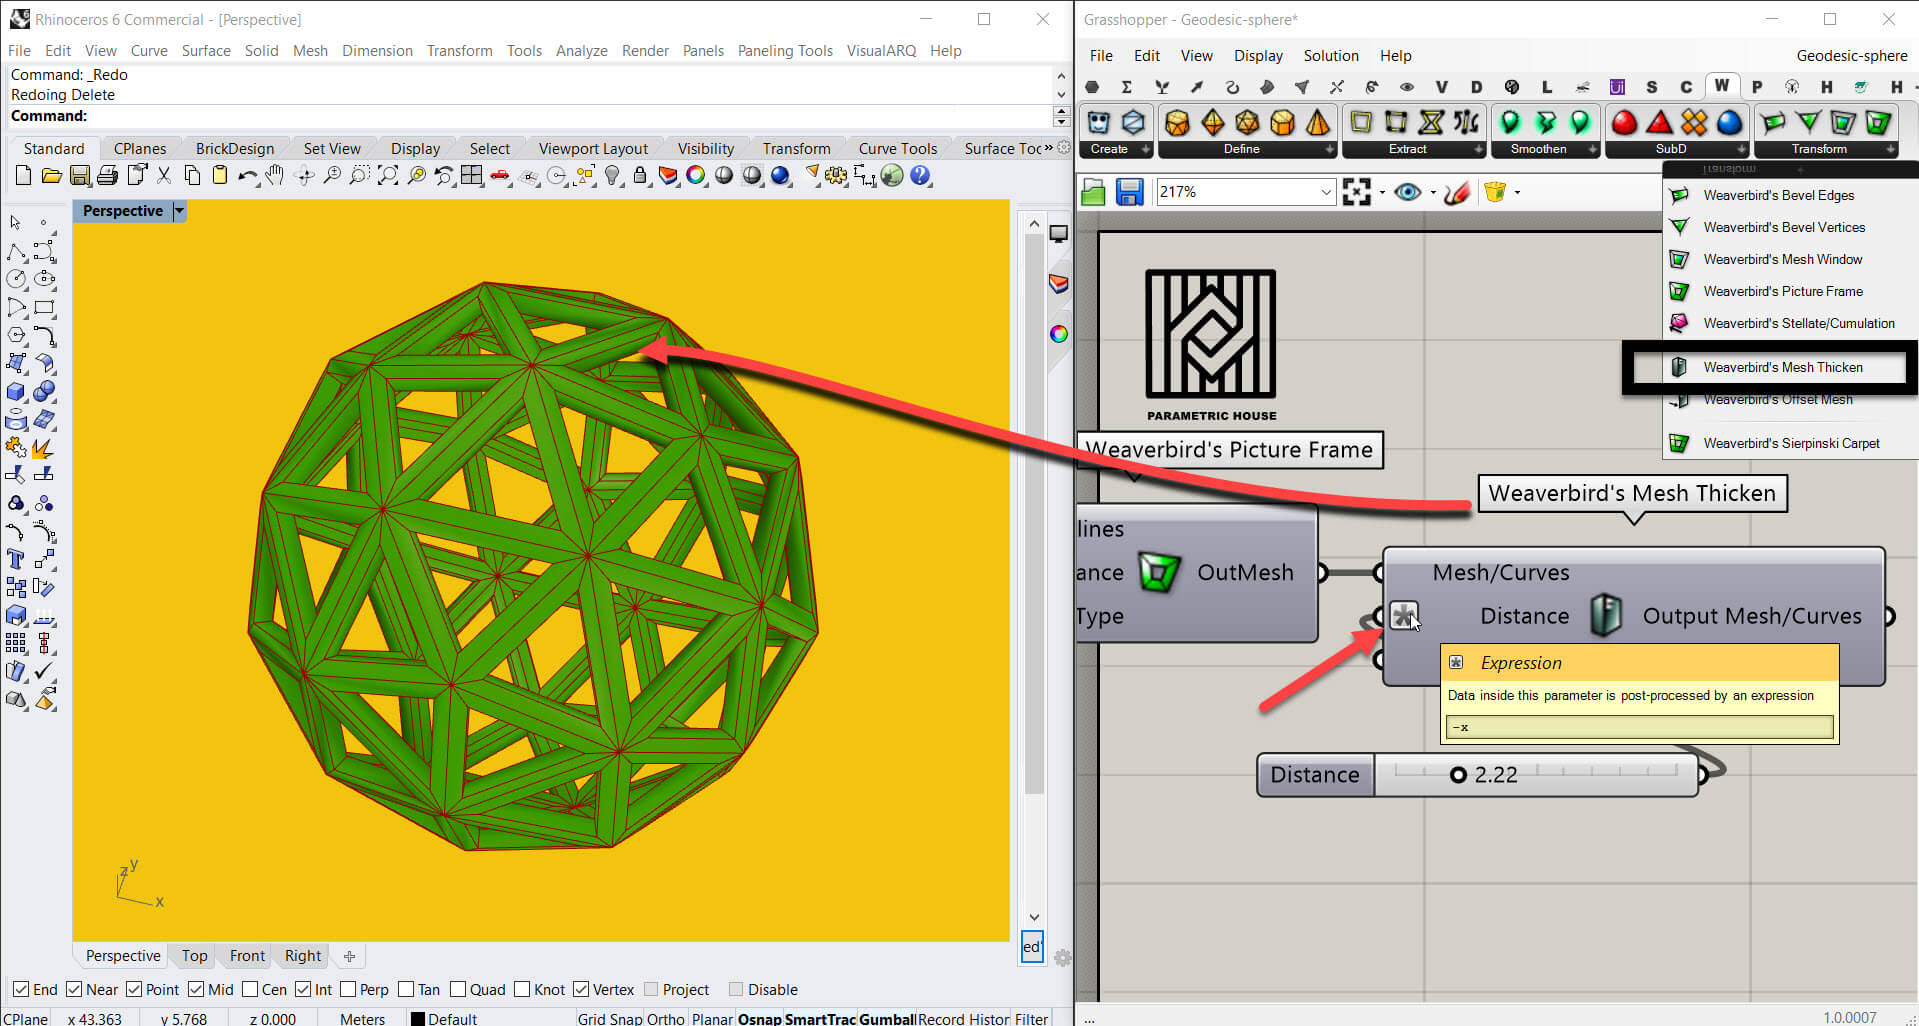
By using “Weaverbird’s Mesh Thicken” component, you can define a distance, offset your picture frames and turn them into a closed solid. If you want to have a thickness in the opposite direction, one thing you can do is to simply add an expression, in this case -x to the distance input. Just right click on the distance, go to the “Expression” and in the “Expression Editor” type “-x”.
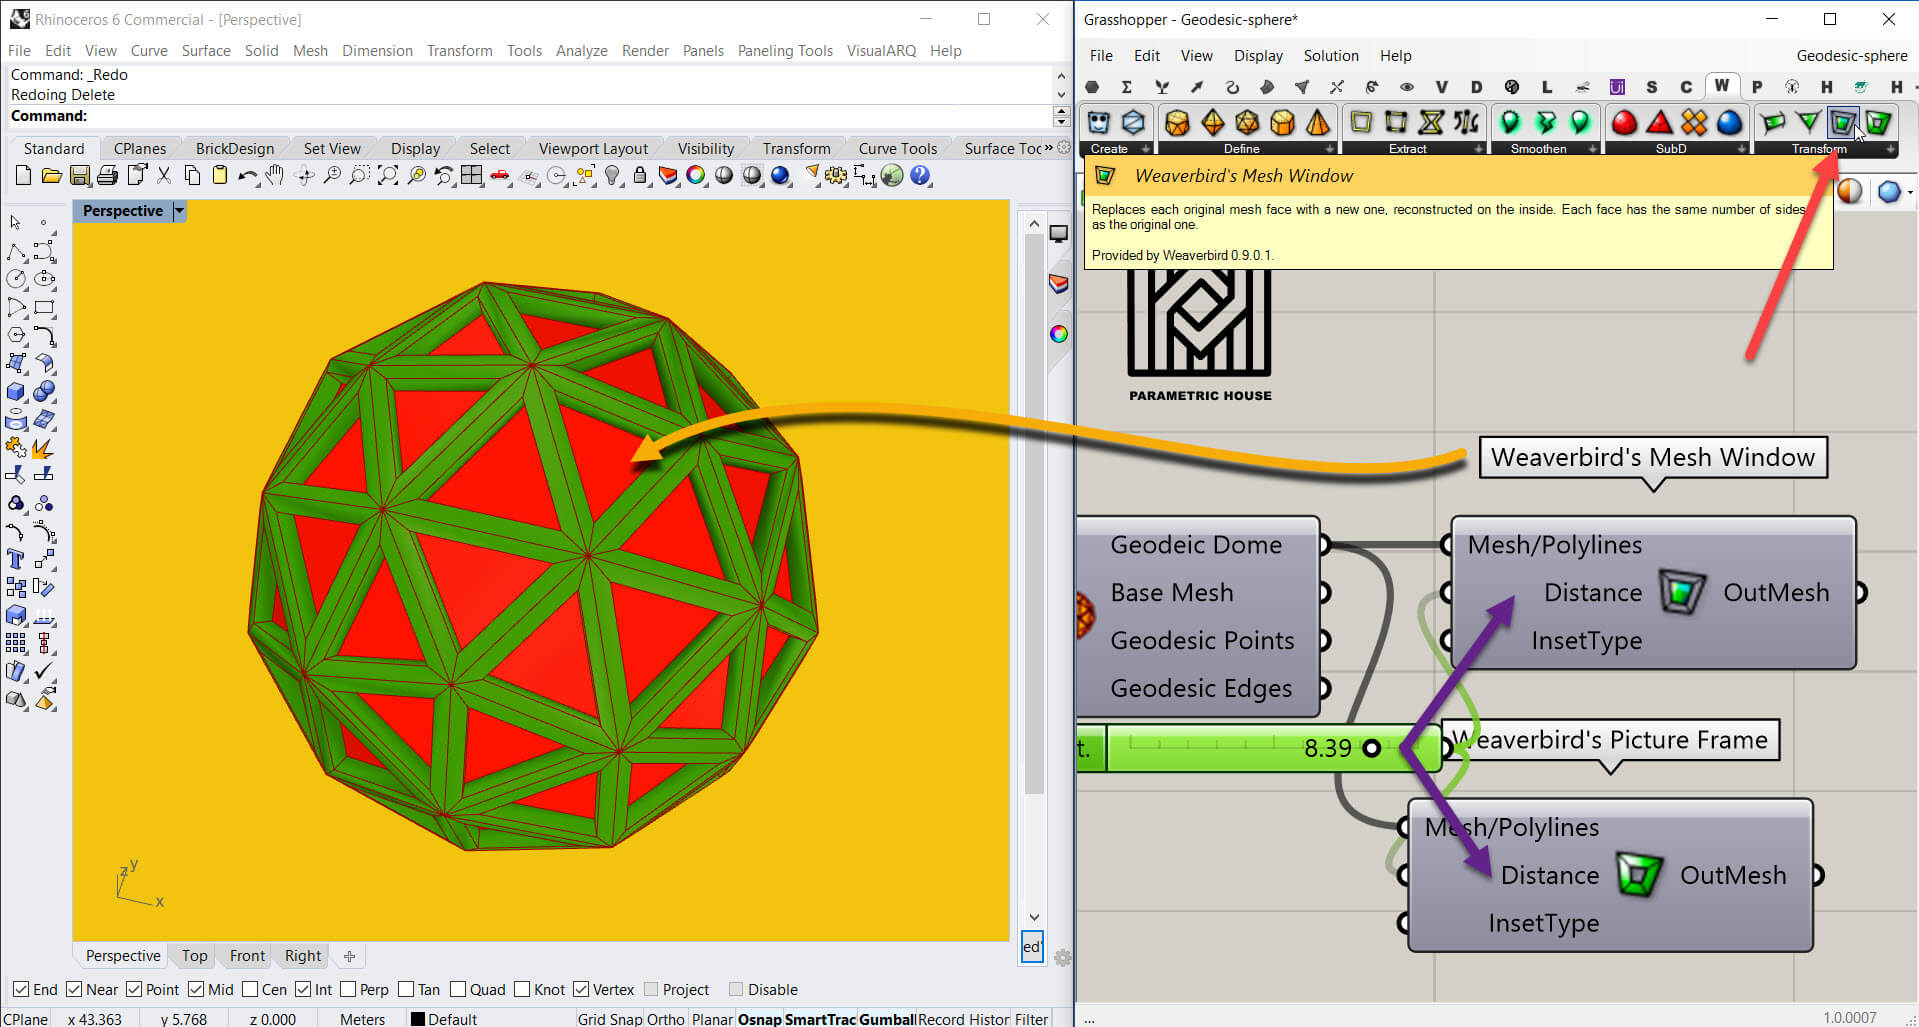
If you use “Weaverbird’s Mesh Window” component, you would have the panels inside the frames too.
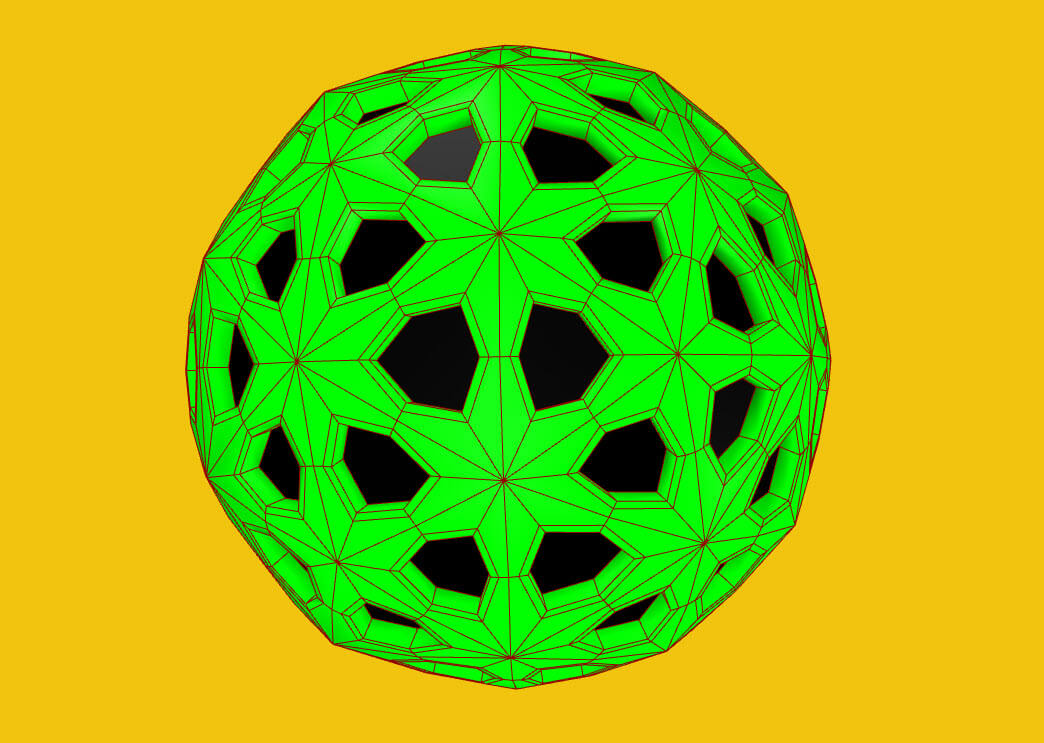
We have also made an extra example file for our course members. You can take other steps to model something similar to the image above.

Comments