
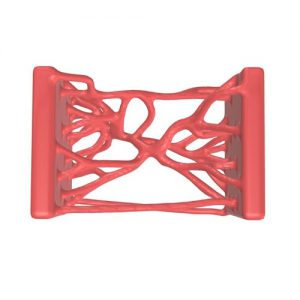
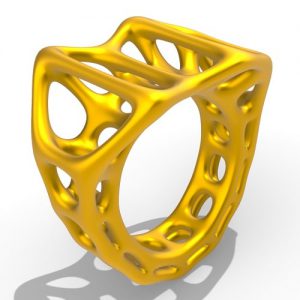
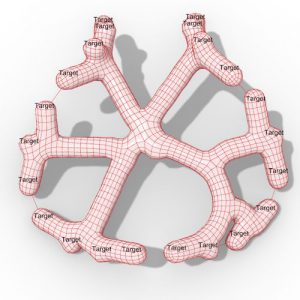
Grasshopper Anemone
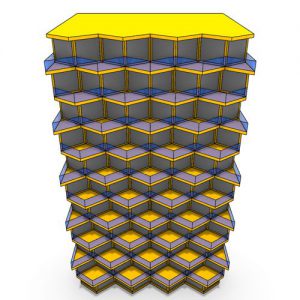
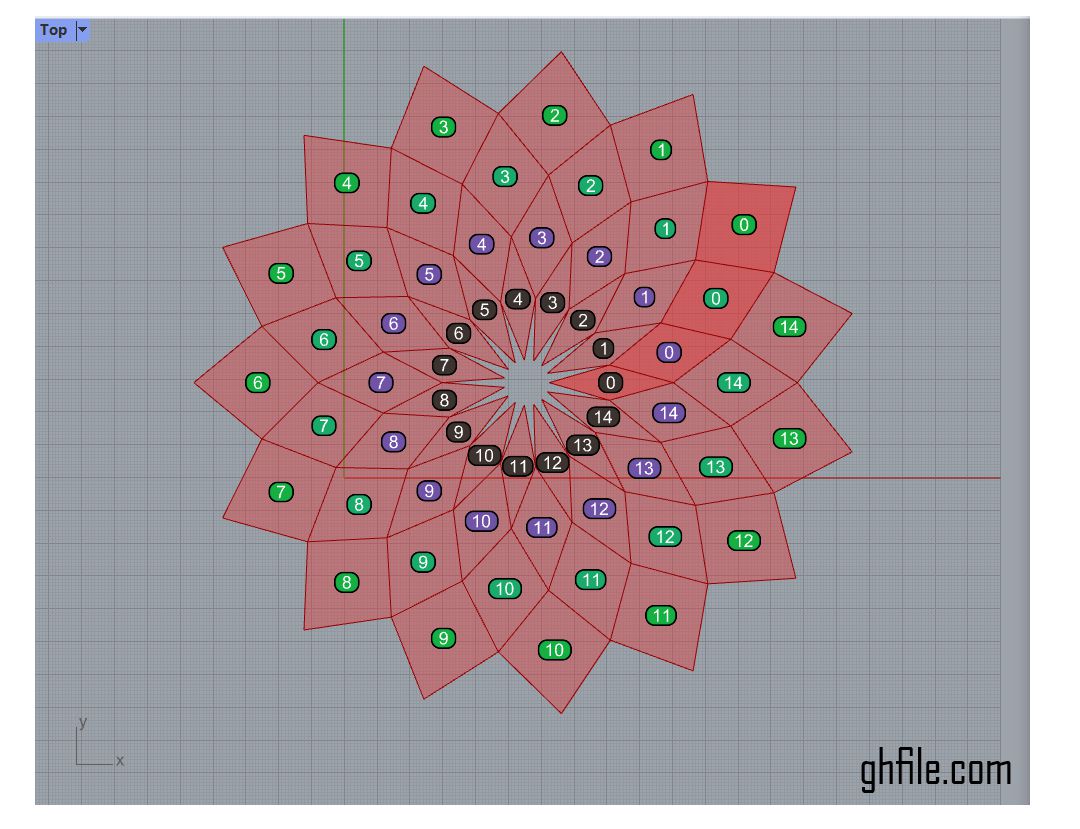 In this Grasshopper Anemone tutorial, we will use a series of circles to design a parametric Radial Diamond pattern in the XY plane.
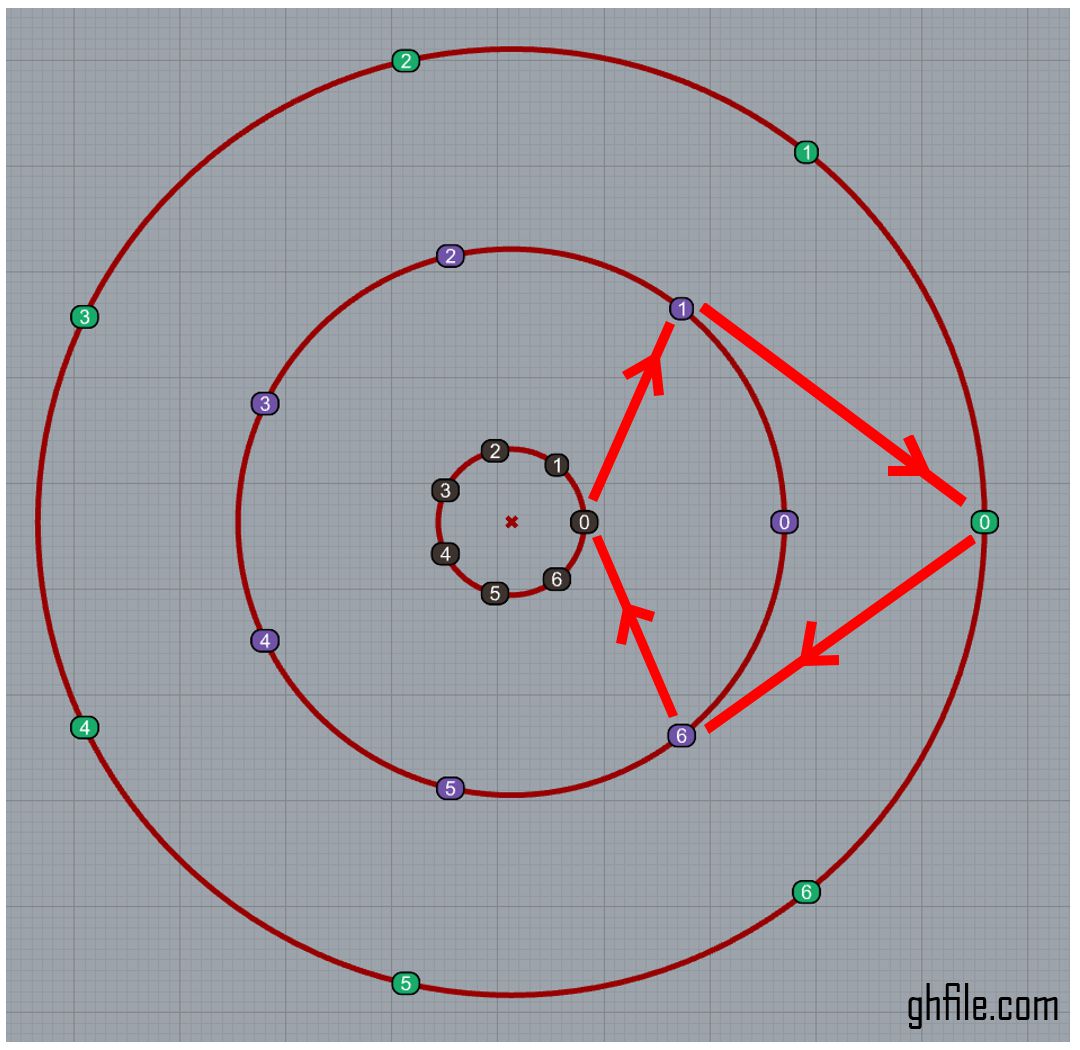
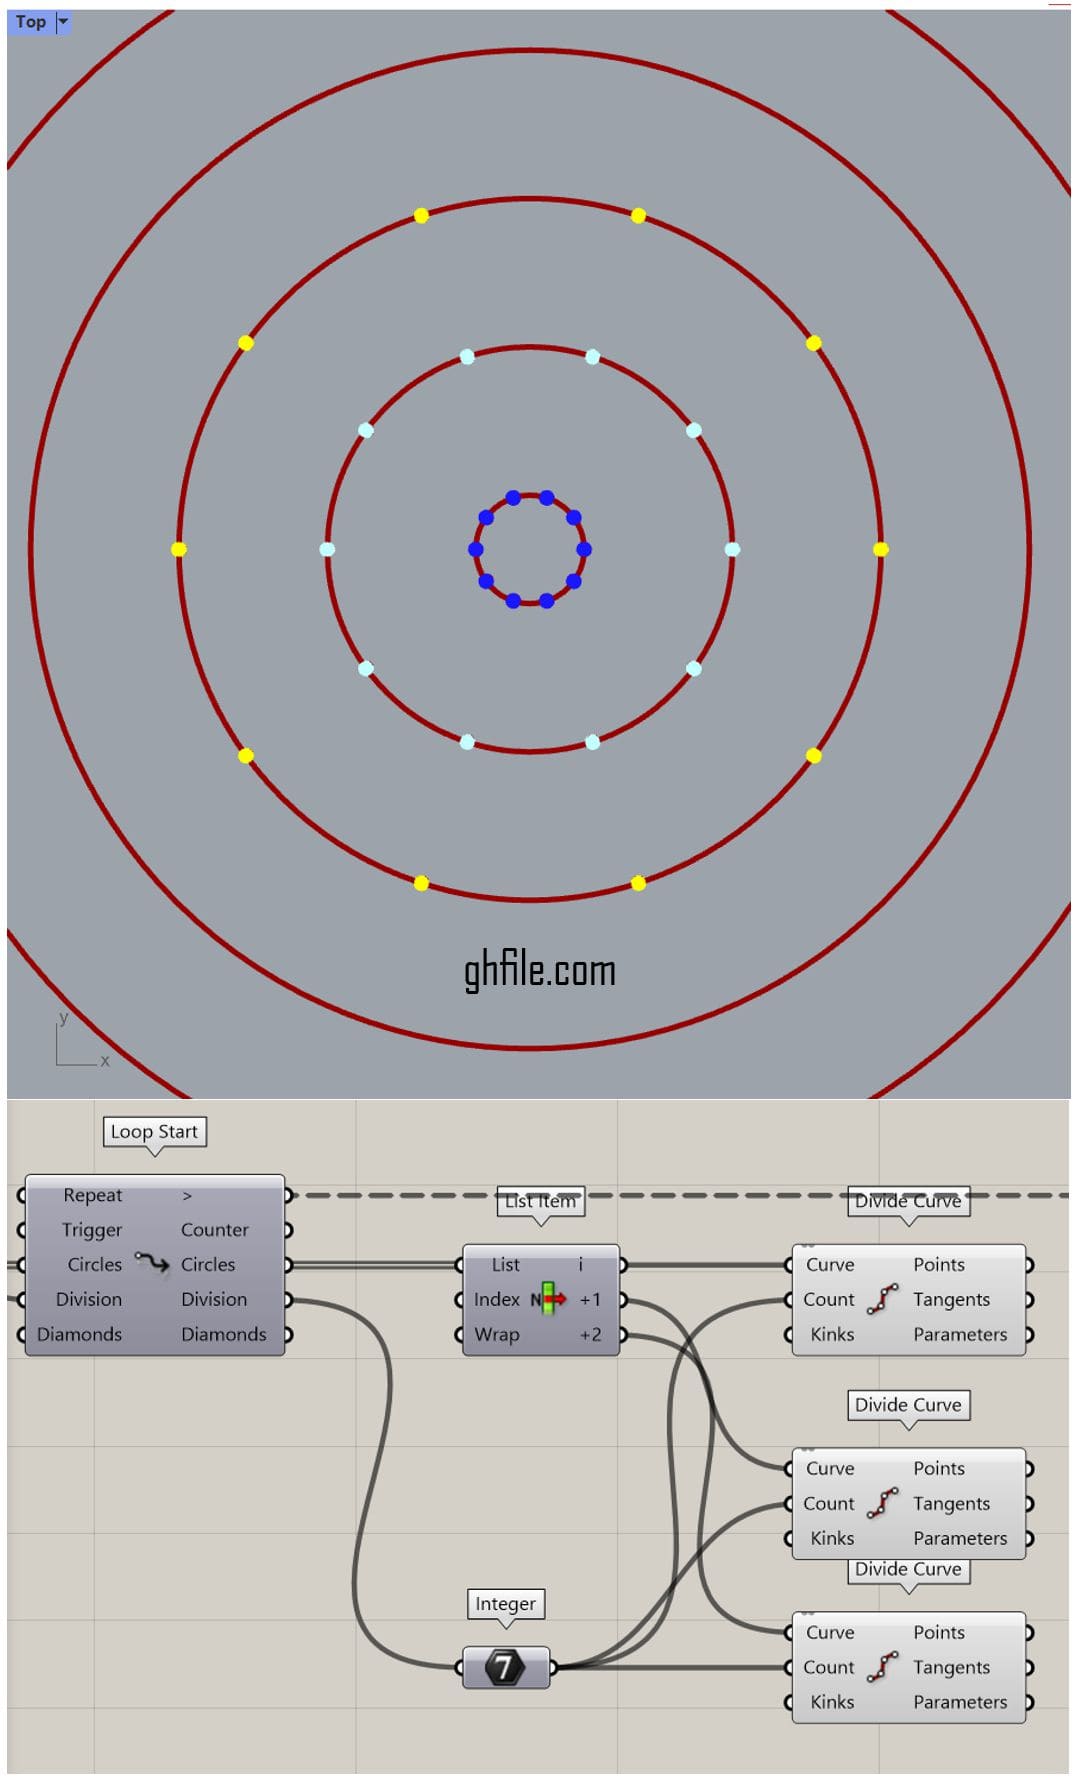
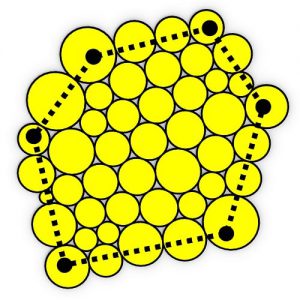
We will use the Anemone plugin to run an algorithm several times to achieve the final results. The algorithm is straightforward. If we have only 3 circles, we need to divide them into a series of points and then connect the relative points as shown above.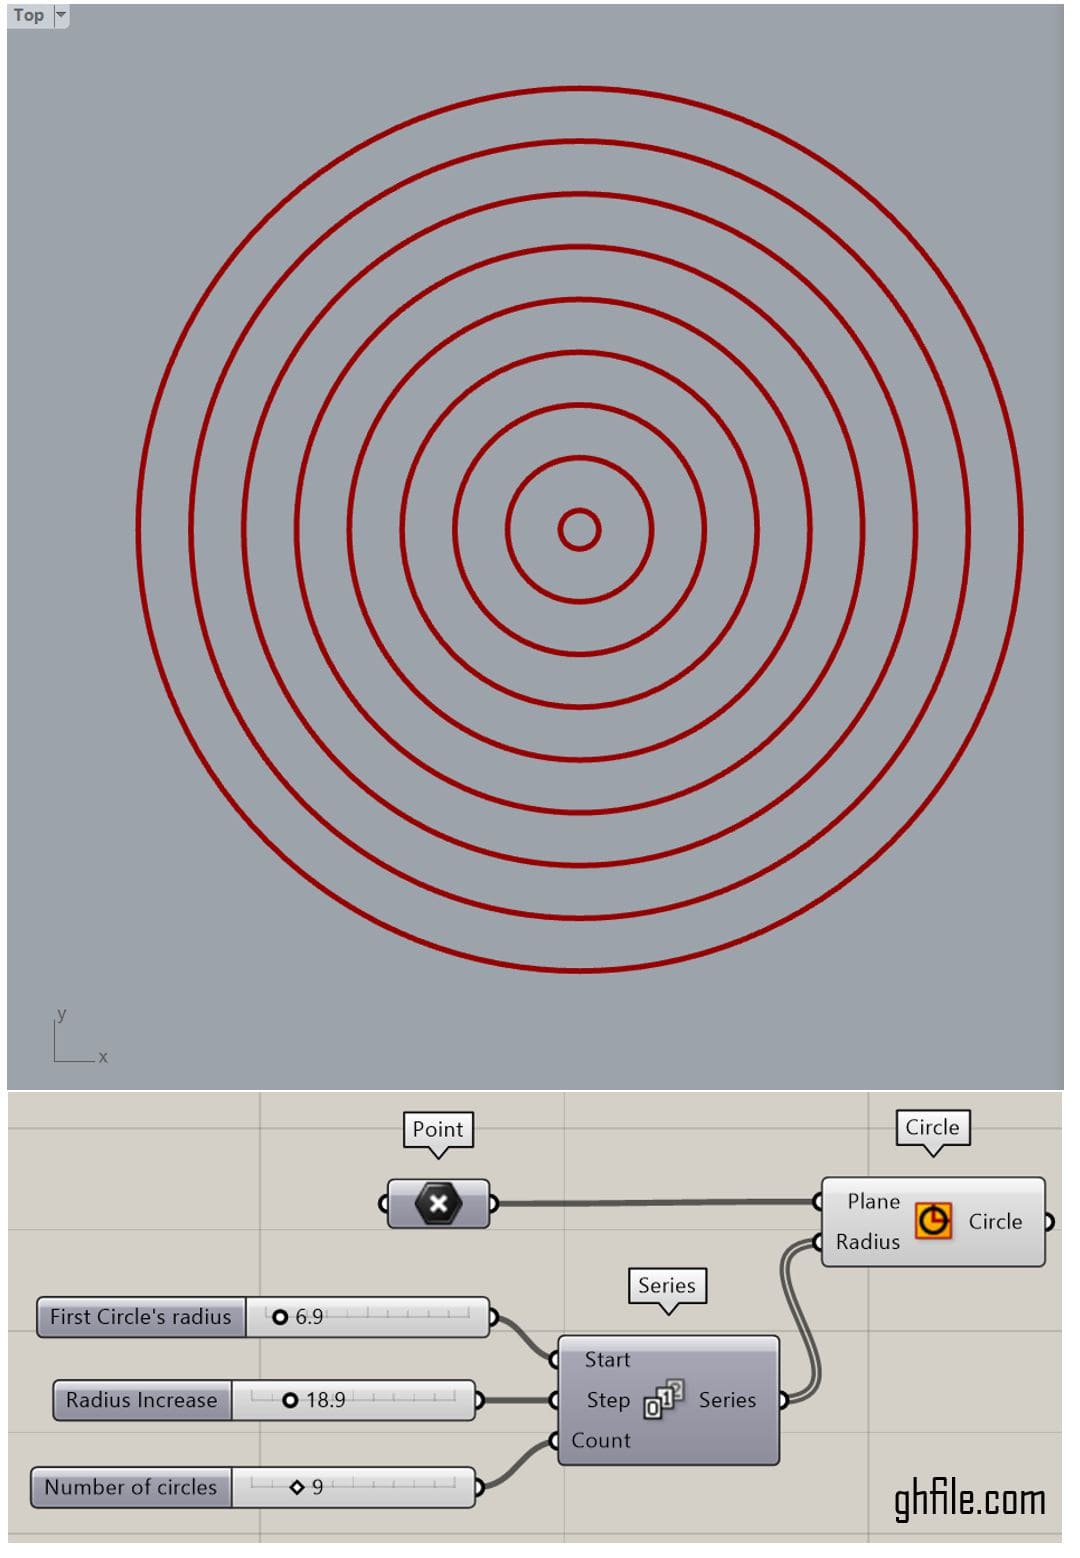 To get started, we will create a series of circles. You can simply use a “Series” component for the radius, where the start input will be the starting radius of the circles. The step input will define how much the radius increases in each step, and the count input will define how many circles we need.
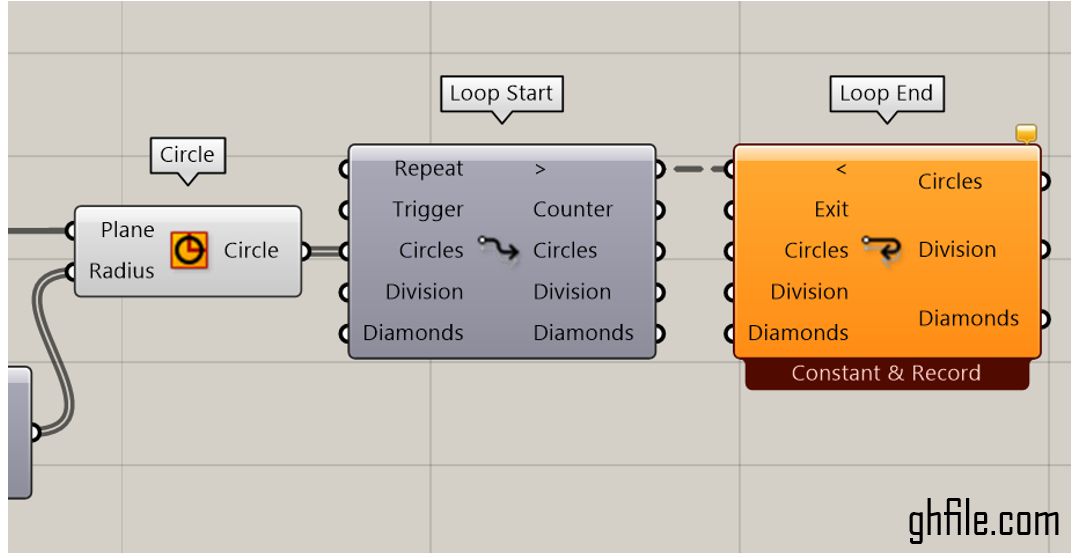 We will create a Loop Start and Loop End using the Anemone plugin. You have to connect the first input of them together to form a loop. We will use 3 parameters. The first is the circles from which we want to extract the diamonds. The second one is how many divisions we will have around the circles, and the third parameter is the diamonds as surface.
 After inputting the circles into the loop, we need to extract only the first 3 circles from the list. We can do that by using the List Item component. Then, we have to divide them into points using the Division component, and the number of divisions is going to be used.
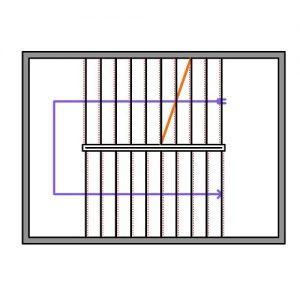
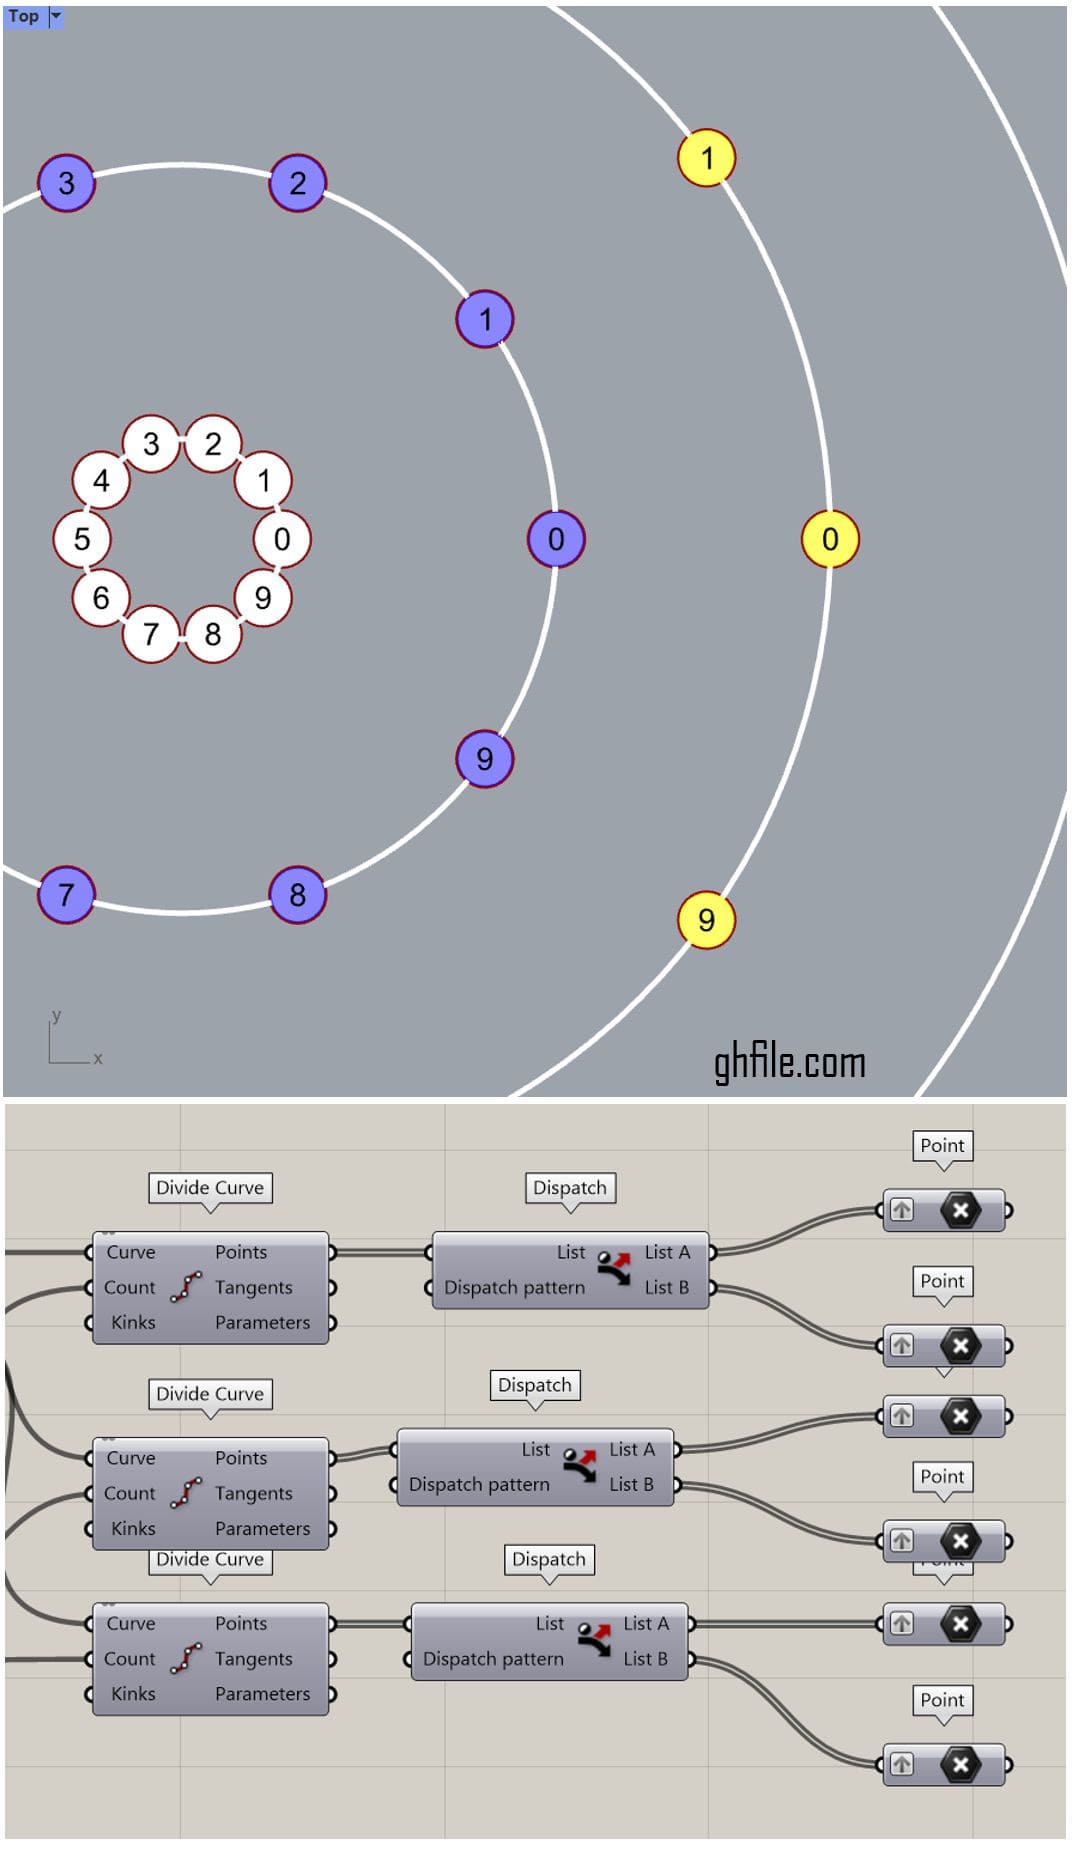 To connect the points together, we need to dispatch the points into two groups. The Dispatch component simply divides the points into groups of True/False outputs. This can be used in the next step to manage the connections more easily.
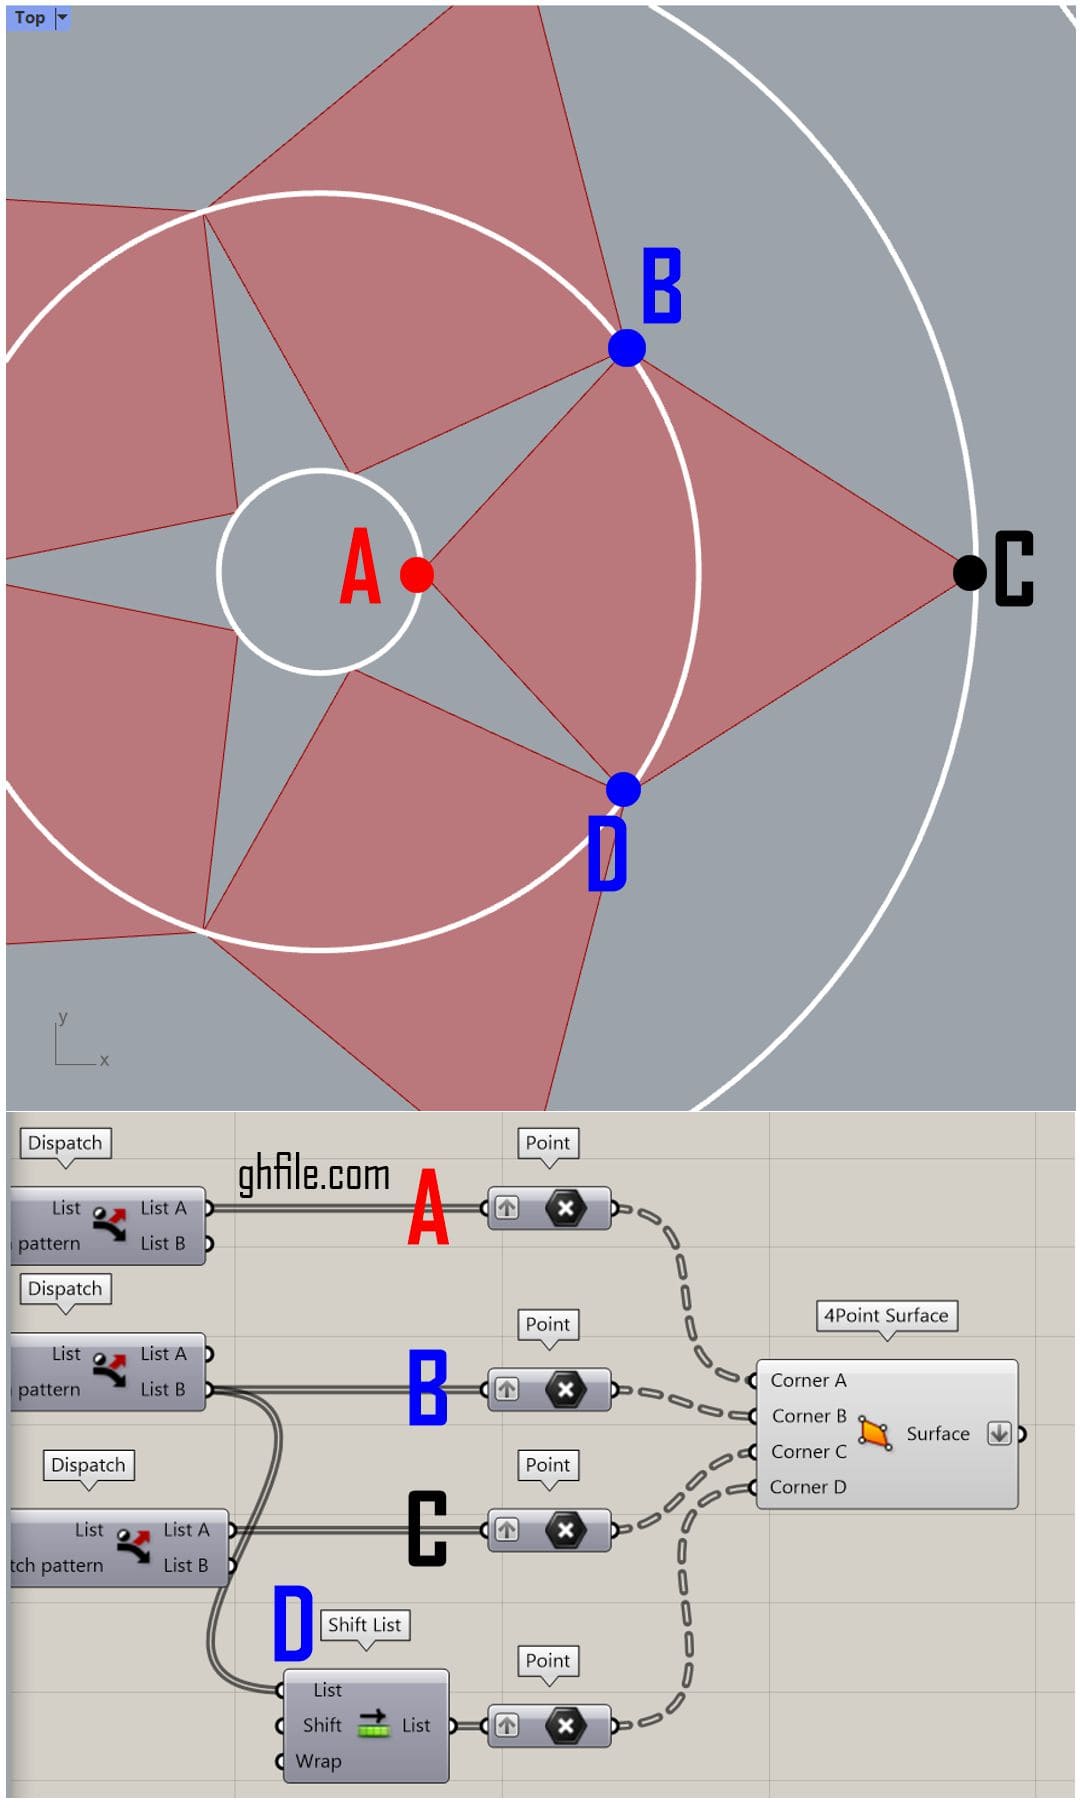 Now, as you can see in the image above, we will connect the points from each of these 3 circles based on the dispatch outputs. We also need to shift the second circle one step back so we can close the diamond using the “4 Point Surface” component.
 To proceed to the next step, we have to shift the circles by one. We can use the Shift List component to move to the next circle and form the second row of diamonds.
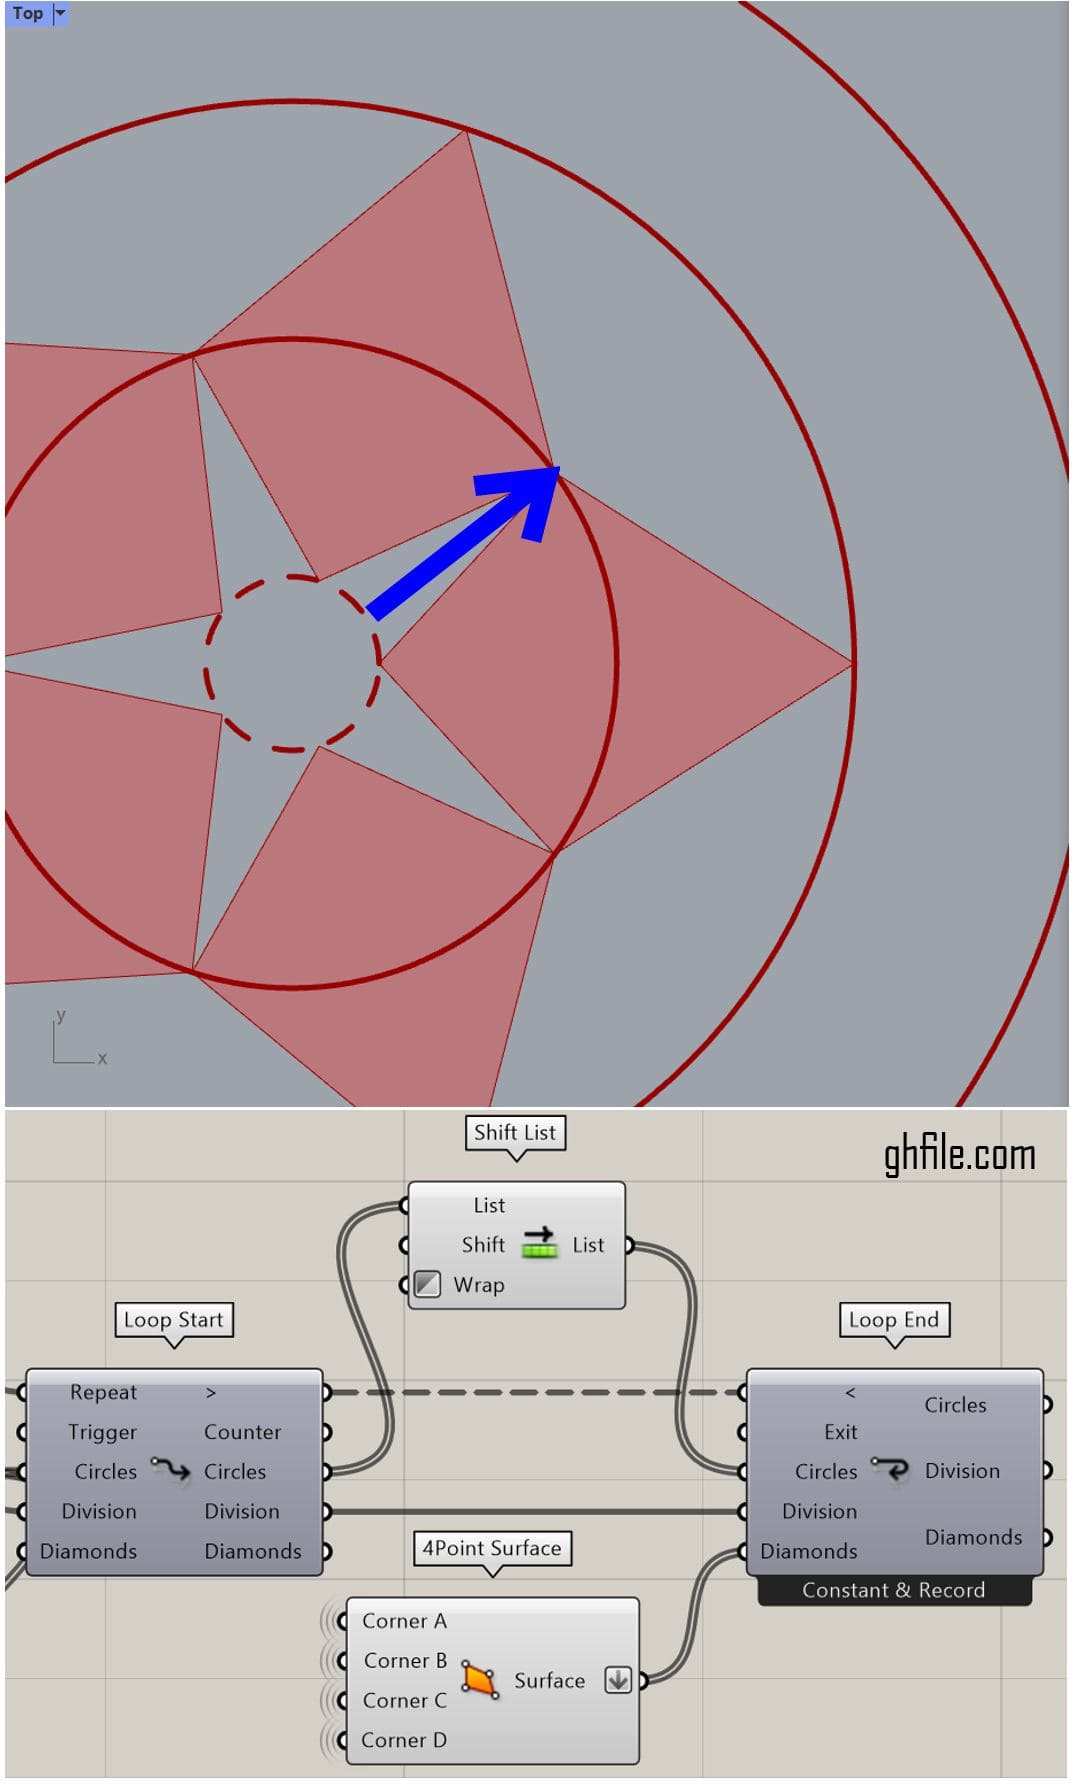
 Because the next row of diamonds needs to be constantly shifted by one point for each loop, we will use the “Counter” output of the loop to constantly shift the points in each successful step.
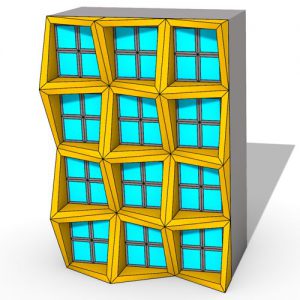
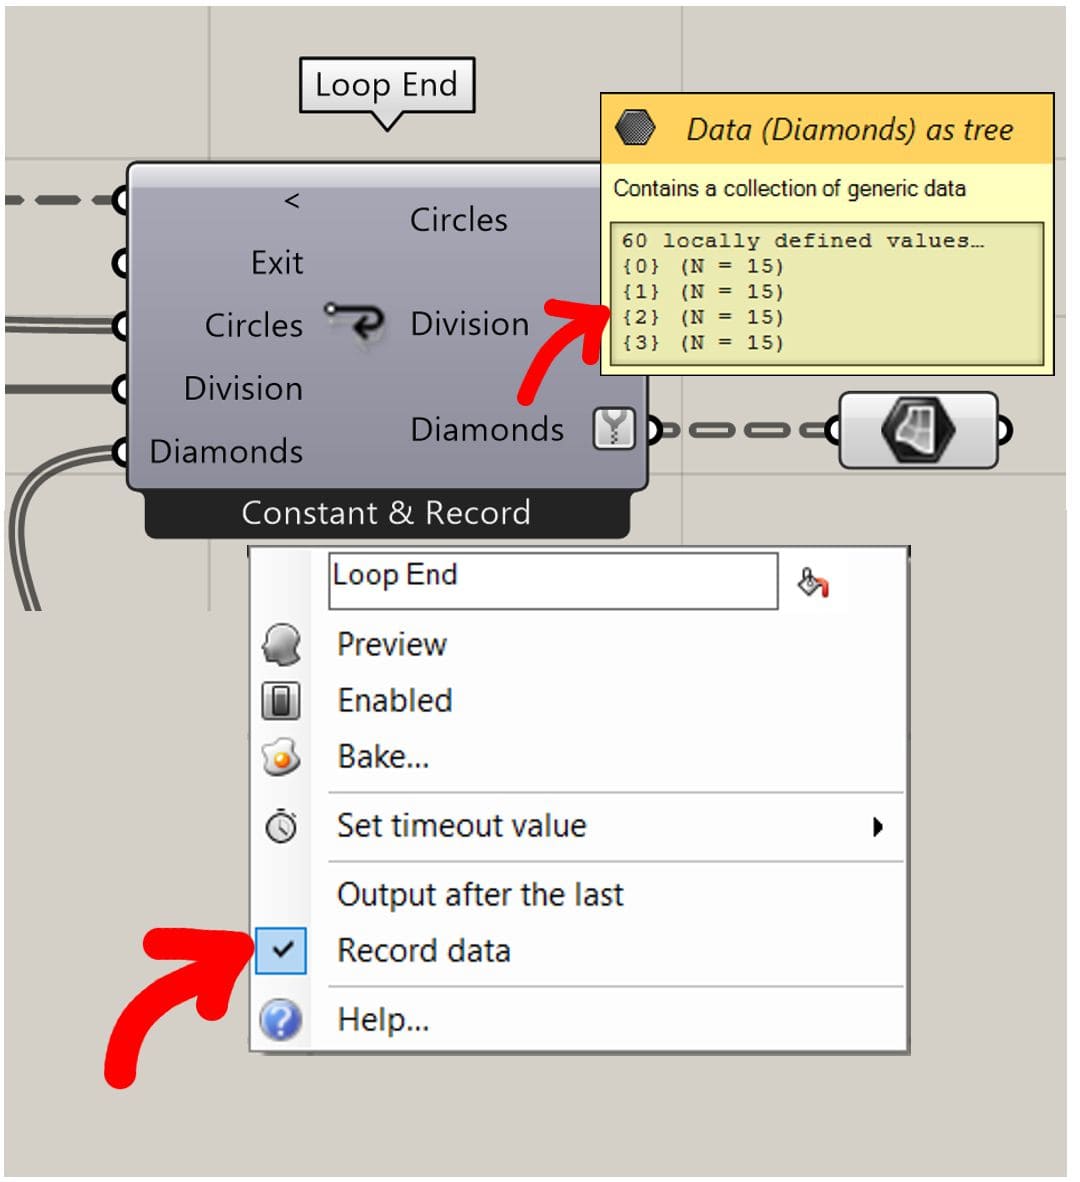 Finally, we can connect the diamonds to the loop’s output and obtain the final results. Be sure to right-click on the loop’s end and select “Record Data” so you can record each step as an output.


Comments
Felsager
This is by far one of the best tutorial out there using loops. This is top quality material. I want to see more of these tutorials on complex patterns and tessellations.
parametric
Glad you found it useful